SEVILLE ORANGE MARMALADE
For a very short time in January and February it is possible to find Seville Oranges on the markets - well, at least in England. Here in Brussels the famous bitter-sweet oranges are a little more tricky to get hold of. So, following several imports from England over the years - thank you Helen... and especially for my gorgeous birthday-preserving pan :-) - I finally managed to find them at Rob. Not sure why that thought had never crossed my mind before - I guess I just love our trips to England :-) But it's true, at Rob's - although not the usual shop to buy our groceries, I admit we do go there sometimes for a special treat in the weekend - and we have managed to find the most unusual ingredients there. Actually, come to think of it, it's rather far from us, so with it's exceptional food variety and worth that special journey, does that make it a 3-star grocery store in Michelin terms?
Anyway, trip to UK or trip to Rob, both are not just fun but well worth it, as the rather bitter-sweet, sour Seville oranges add a unique and distinct flavour to the Marmalade that cannot be achieved with ordinary Oranges. Deliciously tangy and fruity, with a subtle bitterness, studded with pieces of orange peel. On warm buttered toast, a fresh croissant... with a steaming hot cappuccino, espresso or tea on the side - breakfast heaven. Or a spoonful straight from the jar, at any time of day. Yum! But watch out, once home-made, there is no way back.
This recipe is from Delia Smith, so tried, tested and 100% fool-proof, and the only one I have been making for years. I would entrust any rare or expensive ingredient to Delia's advice, and Seville Oranges make no exception. I am not a preserving expert and also follow Delia Smith's advice on sterilising the jars. I have added this as part of the recipe below, but there seem to be many different methods, but if you like, read up on other preserving Web sites to find the one you prefer.
A tip: don't increase quantities by too much, as the Marmalade might behave differently in larger quantities during cooking, using the same size pot: it might take longer to come to a proper boil or set, which might influence its taste, colour and softness of the rind. So, unless you have a very large pot, it's best to make it in two lots. My new birthday-pot is very large, and having finally found Seville oranges here in Brussels, this year I made twice the amount as stated below, so from 1.8 kg Oranges.
It worked well, but I had to add maybe 30 minuters more cooking time at the end until the Marmalade was properly set - I do like mine rather thick though. In any case, Marmalade making is a process that requires patience and love and does not want to be rushed. Perfect for a grey, cold winter's day... and don't forget to buy fresh croissants!
Makes: 2.5l/6lb/2.75kg
900g Seville Oranges (2 lb) (the rougher the skin, the better; larger ones are less fiddle)
2.25 l water (4 pints)
1 lemon, unwaxed
1.8 kg granulated sugar (4 lb), warmed
Equipment:
preserving pan or a heavy-based, large, wide saucepan of app. 6.5 litres capacity
6 x 450g (1 lb) jars with screw tops or preserving jars
(in case of jars without screw tops: 6 cellophane disks, at least 4 cm larger in diameter than the jars, and thin rubber rings)
23cm (9 inch) square piece of muslin or double thickness of gauze (can be bought in the pharmacy)
3-4 small plates
sharp knife
kitchen string
preserves funnel and ladle (or instead a heatproof jug)
6 waxed paper disks
labels, and paper (or pretty fabric) and rubber rings (or string) to decorate

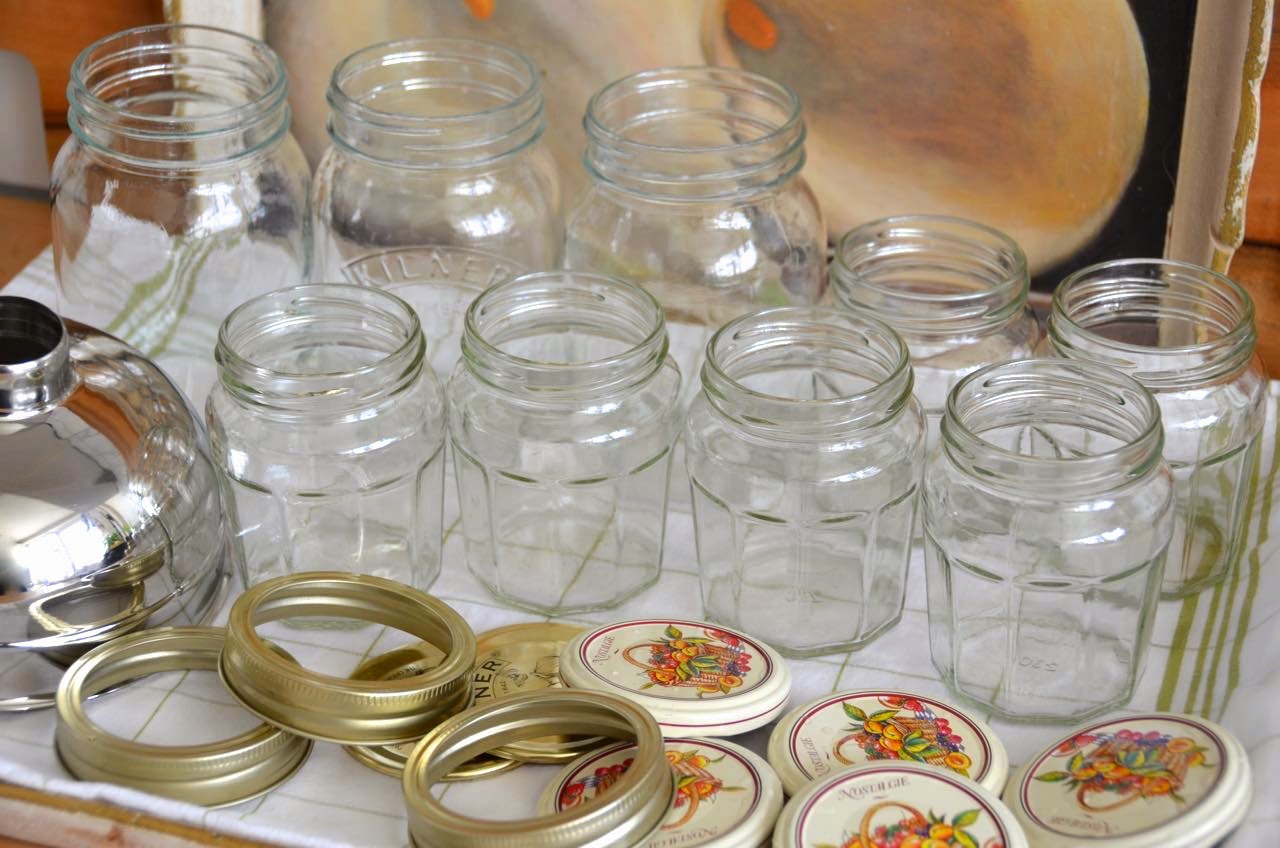
First prepare the jars and lids: wash them in warm, soapy water, then rinse them thoroughly (or put them in the dishwasher without dishwasher liquid on a hot program). Dry completely with a fresh clean tea towel, then place them into the pre-heated oven and sterilise at 125°C (250°F) for approximately 30 minutes. In case your lids have rubber seals on the inside, do not put them in the oven as this might damage the seals!)


Warm up the sugar in the oven. Warm sugar will dissolve faster when added to the Marmalade. To do so, spread the sugar out on a large baking dish or tray in a layer of maximum 2.5 cm depth. Use two dishes if necessary. Heat in the oven at 150°C/130°C fan-assisted. Stir a couple of times so that the sugar heats through evenly.
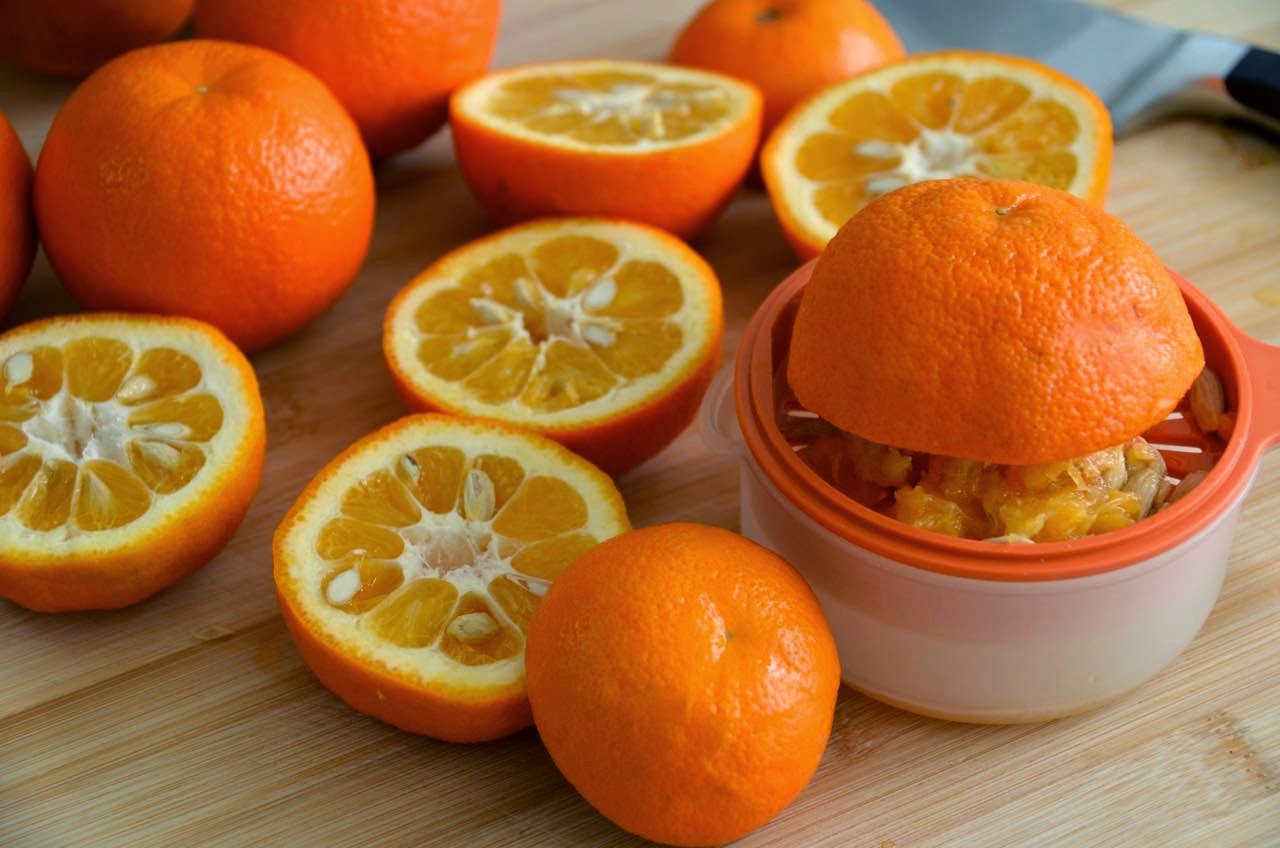
Measure 2.25 l (4 pints) of water into the preserving pan. Lay the gauze square over a medium size bowl. Wash and scrub the oranges and the lemon well. Cut them in half, discarding any stalks, then squeeze out the juices and pour them to the water into the pan; all pips and any pith that cling to the lemon squeezer put into the gauze.


Cut the orange and lemon peel (the lemon peel is optional, but I always add it too) into quarters with a sharp knife, then cut each quarter into thinnish shreds (or a little thicker if you prefer). Tip: if you prefer, you can also use kitchen scissors! Add the shreds to the water, and any pips or spare pith into the gauze. The pith contains a lot of pectin, so don't discard any. Don't worry about any pith clinging on to the shreds, it will dissolve later during boiling.
Tie the pips loosely in the gauze with a string and attach it to the handle of the pan with the bag being suspended in the water.


Bring the liquid to simmering point and simmer gently, and uncovered, for app. 2 hours until the peel is completely soft. To test, press a piece of shred between your finger and thumb. If you can squeeze it in half easily the peel is ready. Make sure the peel is indeed soft before adding the sugar, as the sugar has a hardening effect on the peel and once added, the peel will not soften further during cooking.

Place three or four small side plates into the freezer or fridge to cool. Remove the gauze bag and leave to cool on a plate.
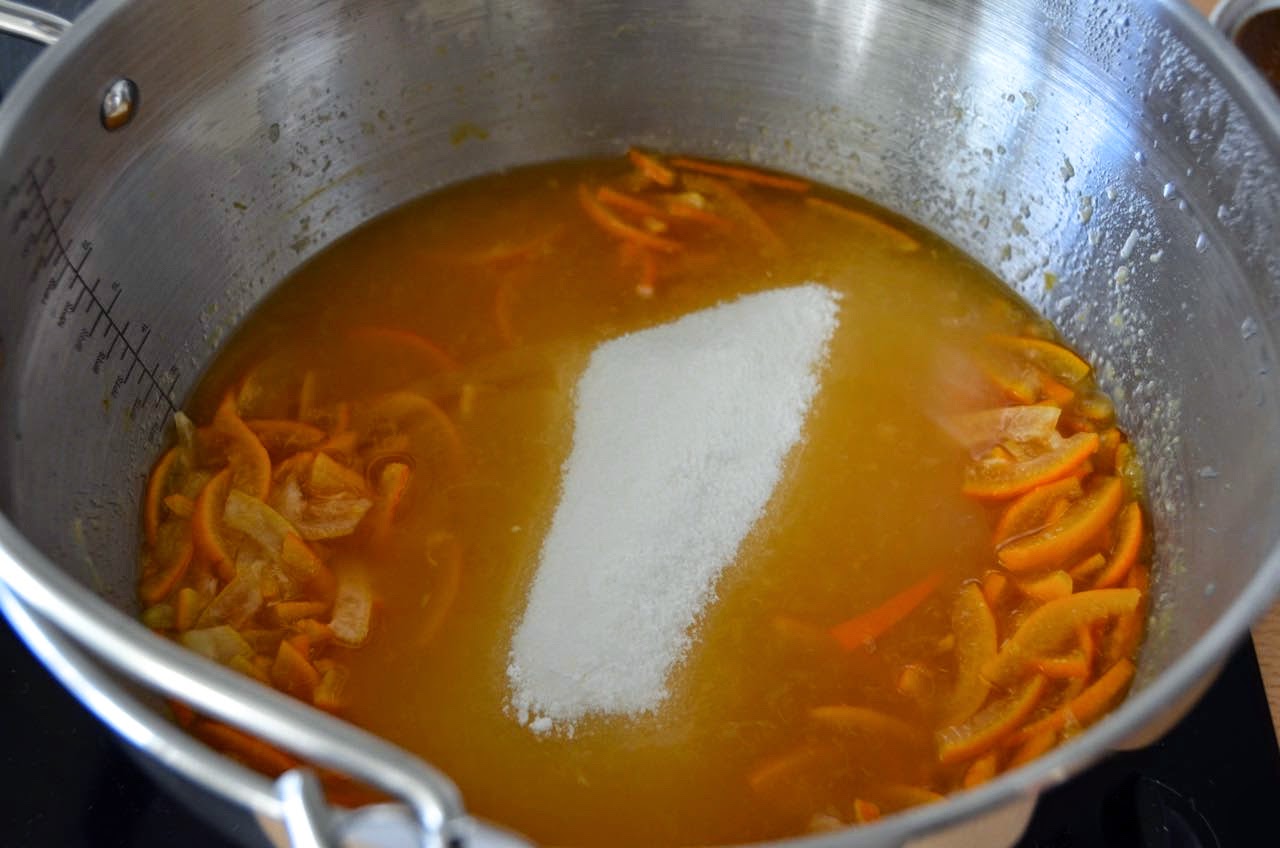
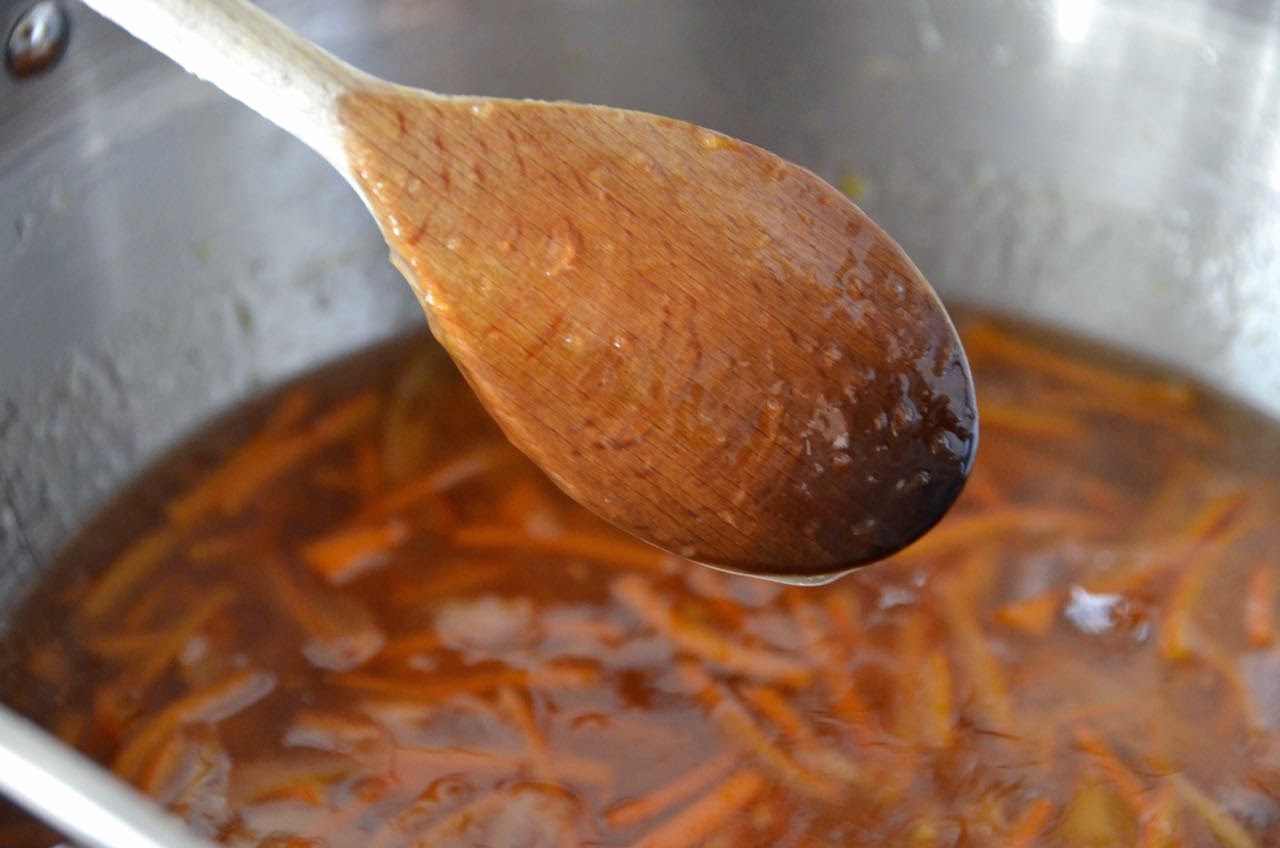
Poor the pre-warmed sugar into the pan and stir it now and then over low heat until all the sugar crystals have dissolved. Test: insert a wooden spoon into the marmalade and remove. There should be no crystals visible on the back of the spoon. Insert and check a couple of times to be on the safe side. This is important, as undissolved sugar crystals will prevent the marmalade from setting properly, with the final Marmalade tasting sugary. When the sugar is fully dissolved, remove the pot from the pan.


Put the gauze bag between 2 plates, then squeeze them together as hard as possible to extract the pectin. Alternatively use your hands (making sure that the bag is sufficiently cooled to avoid burns): to do so hold the bag firmly in one hand and then squeeze and pull the bag away from your hand with the other hand. Repeat this several times to extract all the sticky, jelly-like substance that contains the pectin. As you squeeze, you will see it ooze out. You should be able to extract a couple of tablespoons of pectin from the bag, but it will take a little time, so be patient. Add the pectin to the pot and whisk it into the Marmalade with a balloon whisk.


Place the pot back on the stove and increase the heat to very high. At this point do not stir the Marmalade anymore. As soon as the mixture reaches a really fast boil, start timing. After 15 minutes remove the pot from the heat and wait until the bubbles have subsided.
Spoon a little of the Marmalade onto one of the cooled side plates, then put the plate back into the freezer for a minute to let the Marmalade set. Once cool, push the mixture gently with your little finger. If set, it will have a crinkly skin and not run back. If not, put the pot back on the heat and continue to boil the Marmalade, testing again at 5-minute intervals until the Marmalade is fully set. (In case the Marmalade does not set at all, add a little lemon juice and keep on boiling until set.) The Marmalade is normally set when it goes into a smooth low bubble.
When the Marmalade is set, remove the pan from the heat. Remove the foam that has accumulated on the top. (Delia's tip is to add a little butter to dissolve the scum but I like it's foamy consistency so tend to spoon it off into a jar as our first treat - store any left-overs in the fridge).
Leave the Marmalade to set for app. 20 minutes, which will cool it enough so that the orange shreds will stay equally distributed throughout the Marmalade when ladled into the jars, instead of rising to the top. Meanwhile, re-heat the prepared jars in a moderate oven for 5 minutes. With the aid of a preserving funnel and ladle (you can also use a heat-proof jug instead), pour the marmalade into the warmed jars almost all the way to the top.
Cover with a waxed disc, wax side down, making sure to cover the complete surface. Put the lids on as quickly as possible to create a vacuum. (In case of using cellophane, make the cellophane a little wet on one side, then stretch it over the jar, wet side on top. Secure it with a rubber band. Pull on all sides to straighten the top. Once dry, the cellophane will go stiff.) Wipe the jars clean with a damp cloth to remove any Marmalade that might have escaped on the side. Wait to label the jars until they are cold, or the labels will not stick properly. Decorate the lids with paper or fabric. Store the jars in a dry, cool, dark place. Once opened, keep refrigerated.
_________________________________________________
SEVILLE ORANGE MARMALADE


Makes: 2.5l/6lb/2.75kg
900g Seville Oranges (2 lb) (the rougher the skin, the better; larger ones are less fiddle)
2.25 l water (4 pints)
1 lemon, unwaxed
1.8 kg granulated sugar (4 lb), warmed
Equipment:
preserving pan or a heavy-based, large, wide saucepan of app. 6.5 litres capacity
6 x 450g (1 lb) jars with screw tops or preserving jars
(in case of jars without screw tops: 6 cellophane disks, at least 4 cm larger in diameter than the jars, and thin rubber rings)
23cm (9 inch) square piece of muslin or double thickness of gauze (can be bought in the pharmacy)
3-4 small plates
sharp knife
kitchen string
preserves funnel and ladle (or instead a heatproof jug)
6 waxed paper disks
labels, and paper (or pretty fabric) and rubber rings (or string) to decorate
1) Sterilize the jars: First prepare the jars and lids: wash them in warm, soapy water, then rinse them thoroughly (or put them in the dishwasher without dishwasher liquid on a hot program). Dry completely with a fresh clean tea towel, then place them into the pre-heated oven and sterilise at 125°C (250°F) for approximately 30 minutes. In case your lids have rubber seals on the inside, do not put them in the oven as this might damage the seals!)
2) Warm up the sugar: Warm up the sugar in the oven. Warm sugar will dissolve faster when added to the Marmalade. To do so, spread the sugar out on a large baking dish or tray in a layer of maximum 2.5 cm depth. Use two dishes if necessary. Heat in the oven at 150°C/130°C fan-assisted. Stir a couple of times so that the sugar heats through evenly.
3) Squeeze out the oranges: Measure 2.25 l (4 pints) of water into the preserving pan. Lay the gauze square over a medium size bowl. Wash and scrub the oranges and the lemon well. Cut them in half, discarding any stalks, then squeeze out the juices and pour them to the water into the pan; all pips and any pith that cling to the lemon squeezer put into the gauze.
4) Orangenschale in Streifen schneiden: Cut the orange and lemon peel (the lemon peel is optional, but I always add it too) into quarters with a sharp knife, then cut each quarter into thinnish shreds (or a little thicker if you prefer). Tip: if you prefer, you can also use kitchen scissors! Add the shreds to the water, and any pips or spare pith into the gauze. The pith contains a lot of pectin, so don't discard any. Don't worry about any pith clinging on to the shreds, it will dissolve later during boiling.
5) Tie the pectin bag onto the handle: Tie the pips loosely in the gauze with a string and attach it to the handle of the pan with the bag being suspended in the water.
6) Marmalade kochen: Bring the liquid to simmering point and simmer gently, and uncovered, for app. 2 hours until the peel is completely soft. To test, press a piece of shred between your finger and thumb. If you can squeeze it in half easily the peel is ready. Make sure the peel is indeed soft before adding the sugar, as the sugar has a hardening effect on the peel and once added, the peel will not soften further during cooking.
7) Freeze the testing plates: Place three or four small side plates into the freezer or fridge to cool. Remove the gauze bag and leave to cool on a plate.
8) Add the sugar: Poor the pre-warmed sugar into the pan and stir it now and then over low heat until all the sugar crystals have dissolved. Test: insert a wooden spoon into the marmalade and remove. There should be no crystals visible on the back of the spoon. Insert and check a couple of times to be on the safe side. This is important, as undissolved sugar crystals will prevent the marmalade from setting properly, with the final Marmalade tasting sugary. When the sugar is fully dissolved, remove the pot from the pan.
9) Extract the pectin: Put the gauze bag between 2 plates, then squeeze them together as hard as possible to extract the pectin. Alternatively use your hands (making sure that the bag is sufficiently cooled to avoid burns): to do so hold the bag firmly in one hand and then squeeze and pull the bag away from your hand with the other hand. Repeat this several times to extract all the sticky, jelly-like substance that contains the pectin. As you squeeze, you will see it ooze out. You should be able to extract a couple of tablespoons of pectin from the bag, but it will take a little time, so be patient. Add the pectin to the pot and whisk it into the Marmalade with a balloon whisk.
10) Thicken the Marmalade: Place the pot back on the stove and increase the heat to very high. At this point do not stir the Marmalade anymore. As soon as the mixture reaches a really fast boil, start timing. After 15 minutes remove the pot from the heat and wait until the bubbles have subsided.
11) Test the Marmalade: Spoon a little of the Marmalade onto one of the cooled side plates, then put the plate back into the freezer for a minute to let the Marmalade set. Once cool, push the mixture gently with your little finger. If set, it will have a crinkly skin and not run back. If not, put the pot back on the heat and continue to boil the Marmalade, testing again at 5-minute intervals until the Marmalade is fully set. (In case the Marmalade does not set at all, add a little lemon juice and keep on boiling until set.) The Marmalade is normally set when it goes into a smooth low bubble.
12) Remove the surface foam: When the Marmalade is set, remove the pan from the heat. Remove the foam that has accumulated on the top. (Delia's tip is to add a little butter to dissolve the scum but I like it's foamy consistency so tend to spoon it off into a jar as our first treat - store any left-overs in the fridge).
13) Leave to set: Leave the Marmalade to set for app. 20 minutes, which will cool it enough so that the orange shreds will stay equally distributed throughout the Marmalade when ladled into the jars, instead of rising to the top.
14) Ladle the marmalade into jars: Meanwhile, re-heat the prepared jars in a moderate oven for 5 minutes. With the aid of a preserving funnel and ladle (you can also use a heat-proof jug instead), pour the marmalade into the warmed jars almost all the way to the top.
15) Seal the jars: Cover with a waxed disc, wax side down, making sure to cover the complete surface. Put the lids on as quickly as possible to create a vacuum. (In case of using cellophane, make the cellophane a little wet on one side, then stretch it over the jar, wet side on top. Secure it with a rubber band. Pull on all sides to straighten the top. Once dry, the cellophane will go stiff.) Wipe the jars clean with a damp cloth to remove any Marmalade that might have escaped on the side. Wait to label the jars until they are cold, or the labels will not stick properly. Decorate the lids with paper or fabric.
16) Store: Store the jars in a dry, cool, dark place. Once opened, keep refrigerated.


Comments
Post a Comment