HOMEMADE EGG PASTA
Homemade pasta. What is it that makes it so unique? Is it because it tastes better? Fresher? Or is it simply the fun of making and eating your own? For me it's both. I love the taste and texture - it seems a lot more eggy, elastic, which such beautiful consistency, it's almost as if you can never really overcook it. But also there is something so creative and rewarding about it.
Freshly filled hand-made ravioli... lasagna with homemade sheets of pasta... just try it once and you will be hooked, I promise. Well so was I, at least initially... When I first started making pasta, I would stand at my kitchen counter for hours and hours putting so much time and effort, love and affection into that dough: I was kneading it, and rolling it, and cutting it, and holding it (mostly to show it off) and all by hand... and all with so much looove... Then I got one of those hand crank pasta makers and hooray, all became so much faster and even more fun. Although with that, being an Octopus would have helped tremendously. How are you supposed to turn that handle with one hand, feed the dough through with your other and at the same time pull away the flattened pasta with your third? Who has a third? Luckily there were always those keen helpers gathering around the machine with their additional hands, and you could even have a nice chat with them.
Unfortunately, not long before the novelty of those first homemade pasta strands had worn off. The keen helpers got
Just beware of that home-own Italian engineer trying to improve your pasta roller, while the machine is running, and to the point where the screwdriver gets stuck between the rollers, jamming them and breaking the piece of copper that luckily connects the rollers to the engine, preventing the latter from burning itself out. Needless to say, the engineer spent the rest of the day
Anyway, back to pasta... is there a difference between hand-rolled and KitchenAid rolled? Call me ignorant, but if there is, I honestly can't tell it, so KitchenAid it is. And yes, I count myself very lucky to have one, but it kneads my bread and pasta and takes care of many, many other things that I would otherwise not
Recipe based on basic pasta recipe: calculate 100g flour and 1 large egg per person
Serves 4:
Serves 4:
400 g '00' flour
4 large free-range eggs
1 tsp salt
If you use a KitchenAid: add 1 Tbsp cold water
Additional flour for rolling and drying
KitchenAid Method:
To make the pasta dough:
Sift the flour together with the salt into the mixing bowl. Using the paddle attachment, mix on speed 1 for a couple of seconds until the salt is equally distributed.


Mix on speed 2 for app. 30 seconds, or until the dough starts to come together. Switch to the dough hook and mix for another 2 minutes or until the dough starts to shape into a ball and clears away completely from the sides and bottom of the bowl. When the dough has the right consistency, the sides and bottom of the bowl should be completely clean. If the dough is too wet or dry, add a little more flour or water as necessary, but only a teaspoon at a time.


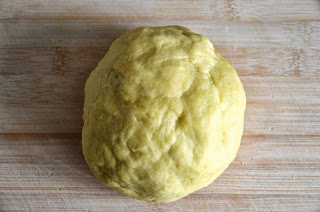
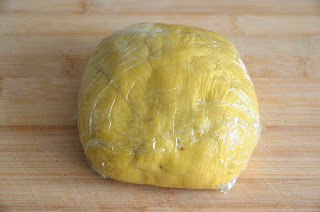
When the dough is no longer rough and floury, but of smooth, silky consistency, remove it from the bowl onto the work surface. Kneed for a couple of minutes by hand. The dough should be a little tacky to the touch but not sticky (which means no dough pieces should get stuck to your hands). If necessary knead in more flour or water, a teaspoon at a time, until the consistency is right. Shape the dough into a ball, wrap tightly into cling film and leave to rest for 30-60 minutes (meanwhile prepare your pasta sauce).
To roll out the pasta:
Attach the Pasta Sheet Roller to your KitchenAid or other pasta machine. Divide the dough into smaller pieces. Take a piece and flatten it with your hands into a long rectangle of app. ½ cm thickness, then sprinkle it with flour.
Adjust the pasta roller to the widest setting (#1). At speed 1 or 2, run the dough piece through the roller. Fold both ends into the middle, thereby creating a straight edge on both sides, and run the piece through again. Fold the dough crosswise or lengthwise and repeat this process 7-9 times, making sure the dough is always sufficiently dusted with flour in order not to get stuck. This step is important as it helps to develop the gluten further and makes the dough elastic and the cooked pasta chewier. You will soon see the difference in the dough.


When the dough sheets feel smooth, almost leathery, and silky, adjust the roller to the next bigger setting (#2) and run the flattened dough piece through twice. Then twice at settings #3, #4, #5, and #6, or until the dough has reached the desired thickness, which is for KitchenAid usually:
#1-2: kneading and thinning dough
#3: thick noodles
#4: egg noodles
#5: fettuccine, tagliatelle, spaghetti, lasagna sheets
#6: ravioli, tortellini, thin fettuccine
If the dough pieces become too long during rolling, just cut them into smaller pieces crosswise. When the dough has reached the required thickness, place it on a flour-dusted work surface. I tend to use a big tray for this rather than put it directly on the work surface as it is more mobile, and I can move the pasta to the side if necessary. Pasta dough tends to dry out quite quickly and once dried will be impossible to cut, so cover the dough sheets with a damp kitchen towel until further use.
Repeat the steps above with the remaining dough pieces.
Cut pasta shapes:
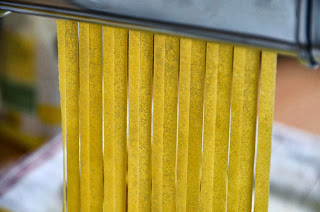
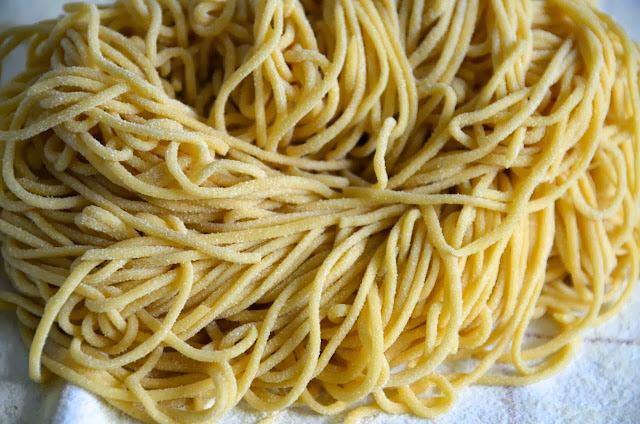
Cut the rolled out sheets into smaller lasagna sheets with a sharp knife or pasta wheel, or fill and cut into ravioli or tortellini. For fettuccine, tagliatelle, or spaghetti replace the Pasta Sheet Roller with the appropriate Pasta Cutting Attachment to cut into the desired shape: to do so, first cut longer dough pieces into smaller 30 cm pieces crosswise with a knife or pasta wheel, then feed the pasta sheets through the pasta cutting attachment to cut into the desired shape.

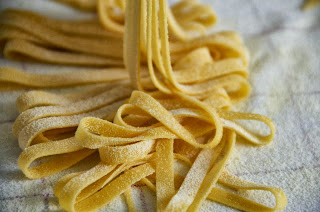

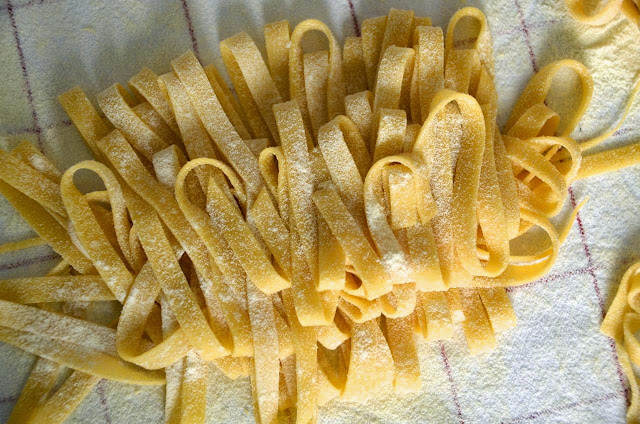
Sprinkle the cut pasta with a little flour, then shape into 'nests' or lay in a single layer on a flour-dusted surface or tray. Alternatively lay over a pasta dryer to dry for later use.

To cook pasta:
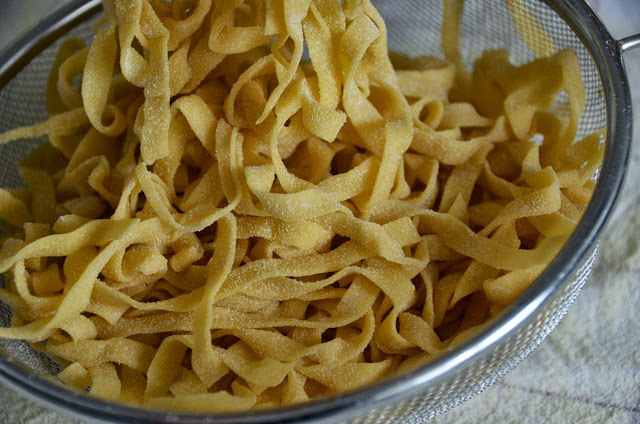
Put plenty of water in a large saucepan, bring to a rolling boil, then add salt. Put the pasta into a mesh strainer and shake off any excess flour. Add the pasta to the boiling water and cook. Fresh pasta takes a lot less time to cook and may take only 2.5 to 5 minutes, depending on the flour used and how long the pasta has been drying.
Store:
Fresh pasta can be used immediately but can also be dried or frozen:
Fresh pasta can be used immediately but can also be dried or frozen:
- To dry, lay the pasta in a single layer on a kitchen towel or over a drying rack and leave to dry completely (this is important, as pasta that is not completely dry can go mouldy during storage). Once dry, store in an airtight container. Avoid to shape the pasta into nests as these will take a lot longer to dry.
- To freeze: lay the pasta in a single layer on a kitchen towel or over a drying rack but leave to dry for only one hour. Dust longer shaped pasta with flour and form into 'nests', then place them into an airtight container and freeze.
- Season the pasta water with plenty of salt. Once cooked, pasta can no longer be seasoned.
- Fresh pasta cooks much faster then dried pasta, so start with 2 minutes cooking time, then check every minute. Alternatively boil a couple of strands first and time them.
- Choose your pasta according to the sauce you are serving it with. Imagine that the sauce needs to be able to attach itself to the pasta, so for rather liquid sauces use pasta with ridges or grainy pasta, for thick sauces use smooth and straight. Combine robuster pasta with robuster sauces, and finer pasta with thinner or cream-based sauces. Spaghetti normally go with all types of sauces.
- Always keep a little of the pasta water when draining off the pasta and add some of it to your pasta just before combining it with the sauce. The starchy water will help to combine the pasta with the sauce and also makes the sauce glossy and smooth.
- Cook your pasta with a bite. If it turns out a little too chewy, you can always soften it more inside the prepared hot sauce. If it's too soft in the first place, there is really no way to fix it.
- Once drained, mix the pasta immediately with the prepared hot sauce and stir well. This will keep it from drying out and the pasta strands from sticking together. Do not rinse the pasta with cold water after draining, especially if the pasta is eaten immediately. Also, there is NO oil required in the pasta cooking water.
- Serve immediately: once the pasta has been mixed with the sauce it should be served immediately. If left to stand, it will absorb the liquid of the sauce and will get soggy and at the same time dry out the sauce.
- In case the pasta is not mixed immediately with the sauce (cold pasta dishes or salads), add a couple of drops of olive oil immediately after draining to prevent the pasta strands from sticking together.
- In case the pasta is not mixed immediately with the sauce (cold pasta dishes or salads), add a couple of drops of olive oil immediately after draining to prevent the pasta strands from sticking together.
- For pasta that needs to be boiled ahead of eating: cook and drain the pasta but keep all the cooking water. Rinse the pasta with cold water to stop it from cooking further. When you are ready to eat, reheat the cooking water, throw the pasta in for a couple of seconds to heat through, then drain again and mix with the prepared sauce.
- Avoid storing undried raw pasta in the fridge as it can turn an unsightly grey.
- Create simple drying racks by placing large ladles on top of large pots and hanging the pasta over the ladles.
- Create simple drying racks by placing large ladles on top of large pots and hanging the pasta over the ladles.
_________________________________________________
HOMEMADE EGG PASTA


Serves 4:
400 g '00' flour
4 large free-range eggs
1 tsp salt
If you use a KitchenAid: add 1 Tbsp cold water
Additional flour for rolling and drying
KitchenAid Method:
To make the pasta dough:
1) Mix flour and salt: Sift the flour together with the salt into the mixing bowl. Using the paddle attachment, mix on speed 1 for a couple of seconds until the salt is equally distributed.
3) Knead on work surface: Kneed for a couple of minutes by hand. The dough should be a little tacky to the touch but not sticky (which means no dough pieces should get stuck to your hands). If necessary knead in more flour or water, a teaspoon at a time, until the consistency is right.
4) Rest the dough: Shape the dough into a ball, wrap tightly into cling film and leave to rest for 30-60 minutes (meanwhile prepare your pasta sauce).
To roll out the pasta:
1) Cut dough into smaller pieces: Divide the dough into smaller pieces. Take a piece and flatten it with your hands into a loNg rectangle of app. ½ cm thickness, then sprinkle it with flour.
3) Setting #1: Adjust the pasta roller to the widest setting (#1). At speed 1 or 2, run the dough piece through the roller. Fold both ends into the middle, thereby creating a straight edge on both sides, and run the piece through again. Fold the dough crosswise or lengthwise and repeat this process 7-9 times, making sure the dough is always sufficiently dusted with flour in order not to get stuck. This step is important as it helps to develop the gluten further and makes the dough elastic and the cooked pasta chewier. You will soon see the difference in the dough.
4) Settings #2 - #6: When the dough sheets feel smooth, almost leathery, and silky, adjust the roller to the next bigger setting (#2) and run the flattened dough piece through twice. Then twice at settings #3, #4, #5, and #6, or until the dough has reached the desired thickness, which is for KitchenAid usually:
#1-2: kneading and thinning dough
#3: thick noodles
#4: egg noodles
#5: fettuccine, tagliatelle, spaghetti, lasagna sheets
#6: ravioli, tortellini, thin fettuccine
If the dough pieces become too long during rolling, just cut them into smaller pieces crosswise. When the dough has reached the required thickness, place it on a flour-dusted work surface. I tend to use a big tray for this rather than put it directly on the work surface as it is more mobile, and I can move the pasta to the side if necessary. Pasta dough tends to dry out quite quickly and once dried will be impossible to cut, so cover the dough sheets with a damp kitchen towel until further use.
Repeat the steps above with the remaining dough pieces.
Cut pasta shapes:
Lasagna, Ravioli, Tortellini: Cut the rolled out sheets into smaller lasagna sheets with a sharp knife or pasta wheel, or fill and cut into ravioli or tortellini.
Fettuccine, Tagliatelle, or Spaghetti: Replace the Pasta Sheet Roller with the appropriate Pasta Cutting Attachment to cut into the desired shape: to do so, first cut longer dough pieces into smaller 30 cm pieces crosswise with a knife or pasta wheel, then feed the pasta sheets through the pasta cutting attachment to cut into the desired shape.
Sprinkle the cut pasta with a little flour, then shape into 'nests' or lay in a single layer on a flour-dusted surface or tray. Alternatively lay over a pasta dryer to dry for later use.
To cook pasta:
Put plenty of water in a large saucepan, bring to a rolling boil, then add salt. Put the pasta into a mesh strainer and shake off any excess flour. Add the pasta to the boiling water and cook. Fresh pasta takes a lot less time to cook and may take only 2.5 to 5 minutes, depending on the flour used and how long the pasta has been drying.
Store:
Fresh pasta can be used immediately but can also be dried or frozen:
- To dry, lay the pasta in a single layer on a kitchen towel or over a drying rack and leave to dry completely (this is important, as pasta that is not completely dry can go mouldy during storage). Once dry, store in an airtight container. Avoid to shape the pasta into nests as these will take a lot longer to dry.
- To freeze: lay the pasta in a single layer on a kitchen towel or over a drying rack but leave to dry for only one hour. Dust longer shaped pasta with flour and form into 'nests', then place them into an airtight container and freeze.
_________________________________________________
Handmade Pasta:
To make the pasta dough:
Mix the flour and salt well. Sieve onto the work surface or into a large bowl. Make a well in the middle and crack the eggs inside. Beat the eggs with a fork until smooth, then with your fingertips, start to incorporate the flour little by little from the sides. Keep on working more and more flour into the eggs until everything is fully combined. Thoroughly knead the dough to work the gluten until you have smooth, silky dough that is no longer rough and floury. The dough should be slightly tacky, but not sticky. Depending on the size of the eggs used, add a little more water. You can do this by wetting your hands with water and then carrying on to knead the dough. Alternatively add more flour, 1 teaspoon at a time. Shape the dough into a ball, wrap tight into cling film and leave to rest for 30-60 minutes (meanwhile prepare your pasta sauce).
To roll out the pasta:
Pasta dough is quite compact and difficult to roll out in one piece, therefore cut the dough first into smaller pieces, then roll each piece separately with a rolling pin into a rectangle of desired thickness. Pasta dough tends to dry out quite quickly and once dried will be impossible to cut, so cover all dough pieces with a damp kitchen towel if necessary.
To cut the pasta:
Cut the rolled out sheets into smaller lasagna sheets with a sharp knife or pasta wheel, or fill and cut into ravioli or tortellini. For fettuccine, tagliatelle, or spaghetti, dust each sheet with plenty of flour, then roll it up into a log. Cut across the log at desired thickness to create Fettuccine or Tagliatelle. Untangle the pasta rolls and lay them out on the work surface. Sprinkle the cut pasta with a little flour, then shape into 'nests' or lay in a single layer on a flour-dusted surface. Alternatively lay over a pasta dryer to dry for later use.
_________________________________________________
Pasta Tips:
- Season the pasta water with plenty of salt. Once cooked, pasta can no longer be seasoned.
- Fresh pasta cooks much faster then dried pasta, so start with 2 minutes cooking time, then check every minute. Alternatively boil a couple of strands first and time them.
- Choose your pasta according to the sauce you are serving it with. Imagine that the sauce needs to be able to attach itself to the pasta, so for rather liquid sauces use pasta with ridges or grainy pasta, for thick sauces use smooth and straight. Combine robuster pasta with robuster sauces, and finer pasta with thinner or cream-based sauces. Spaghetti normally go with all types of sauces.
- Always keep a little of the pasta water when draining off the pasta and add some of it to your pasta just before combining it with the sauce. The starchy water will help to combine the pasta with the sauce and also makes the sauce glossy and smooth.
- Cook your pasta with a bite. If it turns out a little too chewy, you can always soften it more inside the prepared hot sauce. If it's too soft in the first place, there is really no way to fix it.
- Once drained, mix the pasta immediately with the prepared hot sauce and stir well. This will keep it from drying out and the pasta strands from sticking together. Do not rinse the pasta with cold water after draining, especially if the pasta is eaten immediately. Also, there is NO oil required in the pasta cooking water.
- Serve immediately: once the pasta has been mixed with the sauce it should be served immediately. If left to stand, it will absorb the liquid of the sauce and will get soggy and at the same time dry out the sauce.
- In case the pasta is not mixed immediately with the sauce (cold pasta dishes or salads), add a couple of drops of olive oil immediately after draining to prevent the pasta strands from sticking together.
- For pasta that needs to be boiled ahead of eating: cook and drain the pasta but keep all the cooking water. Rinse the pasta with cold water to stop it from cooking further. When you are ready to eat, reheat the cooking water, throw the pasta in for a couple of seconds to heat through, then drain again and mix with the prepared sauce.
- Avoid storing undried raw pasta in the fridge as it can turn an unsightly grey.
- Create simple drying racks by placing large ladles on top of large pots and hanging the pasta over the ladles.




Comments
Post a Comment